For millennia, yogis and spiritual seekers have adopted Mala beads as a helpful meditation tool. Mala initially appeared in India over 3,000 years ago in Buddhist and Hindu prayer during ceremonial meditation known as Japa. They are still used today for concentration during meditation, yoga, and affirmations. These can be found in a variety of materials such as wood, metal, and stone.
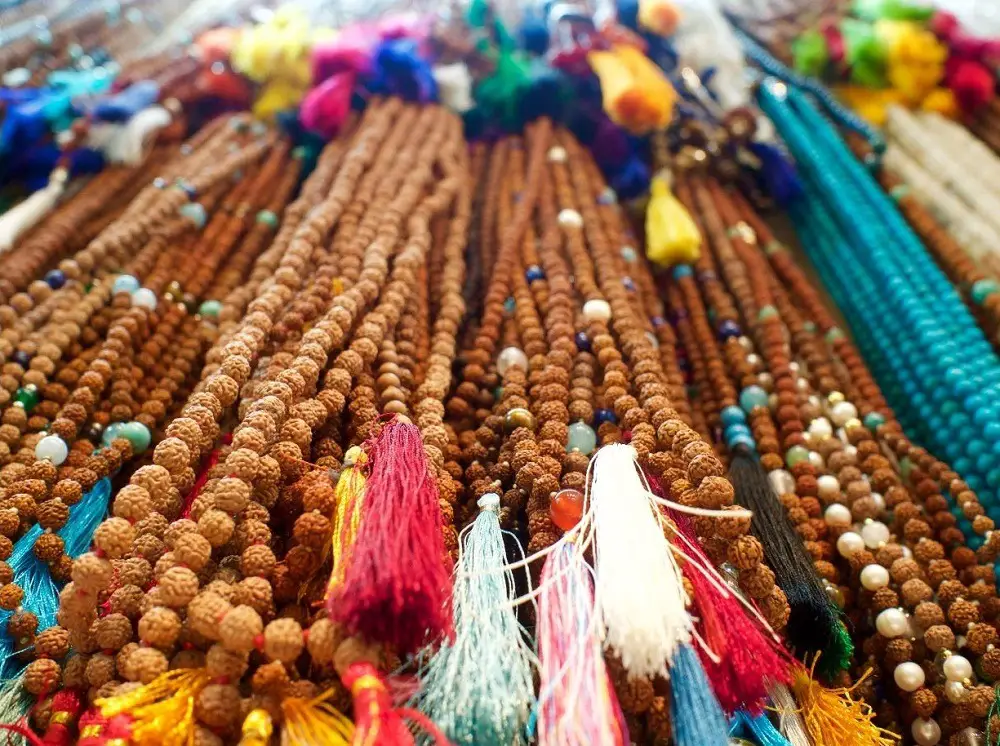
Mala beads are commonly used to track the number of times a mantra or phrase is repeated. A string typically has 108 beads, with a decorative tassel at the end, occasionally embellished further with decorations or amulets. They are frequently compared to Catholic rosaries, which are also widely used for religious purposes.
There are several theories floating around as to why Malas have 108 beads. In Hinduism, it’s considered a sacred number; one represents God, the universe, or your own highest truth; 0 stands for emptiness and humility in spiritual practice; and 8 stands for infinity and timelessness. This number also holds significance because there are 108 energy lines leading to the heart chakra.
How to make your own DIY Mala Beads
You can make your own Mala beads if you want to build something truly unique to yourself and what’s more, you have the freedom to use whichever beads you like. Semi-precious crystals are an excellent choice since you can select a stone that reflects anything you want in your life, such as rose quartz for love or tiger’s eye for anxiety relief.
Crafting your own could be a meditative experience in and of itself; as you knot each bead into your rope, you can reflect on the intentions you are setting or repeat your own personal mantra. Want to know how to make your own Mala beads? Check out our step-by-step guide below.
Step 1 – Choose your beads
Each designer of mala jewelry and those who wear Malas have their own interpretation of what mala beads symbolize. To begin, you must decide which goals are most important to you, which aspects of your life you want to focus on or better, and which obstacles you are facing. This will help you to choose the best beads for you. Here are some ideas:
You can choose your beads based on the metaphysical properties of the stones. According to crystal healing practitioners, Gemstones convey power or energy vibrations that can influence spiritual and occasionally bodily changes such as healing. For example, amethyst is often associated with stress reduction, selenite supposedly promotes self-love, and amber is often used for protection.
Alternatively, you could base your selection of beads in accordance with the 7 chakras. Chakras are energy centers in the human body that are connected with certain characteristics. There are various schools of thought on the number of chakras, however, there is a widely acknowledged 7-chakra system that starts at the top of your head and finishes at your feet. There are different gemstones associated with each chakra.
Some people also choose their beads based on their zodiac signs. Zodiac gemstones, also known as astral stones, symbolise your astrological sign and so respond particularly strongly to specific stones.
There are also planetary stones, which are derived from an ancient concept that jewels have affinities with planets, and so the signs have ruling planets. Talismanic stones are supposed to provide extra protection and power. The zodiac sign must then be carved or etched into these stones.
If none of these options appeal to you, you can base your choice of beads solely on the different colors. Color psychology states that humans have subconscious sensitivities to colour. Of course, if a colour is your favourite, you may be affected differently than others, but there are certain common colour connections. Choose your favourite colour or gemstones based on the attributes you want to foster and enhance.
Step 2 – Gather your supplies
Next, get all of the equipment you need to put the Mala together. We’ve listed the basic tools required below, all of which can be found at most good craft stores.
- 108 beads (recommended size: 6mm-8mm)
- 1 guru bead (this bead lies outside the circle of 108, above the tassel)
- String/cord (recommended thickness: 0.7mm-1mm)
- Tassel or charm
- spacer beads (optional)
- Superglue
- Glue (for knot)
- Scissors
The Guru bead represents the completion of a whole practise. When you reach this bead, you can either stop chanting or continue. If you use the Mala bracelet in conjunction with your meditation practise, you will chant 18 times; one cycle for each bead.
When you begin meditating with the Mala necklace, the tassel represents eternity and is normally oriented towards you. The tassel can also represent a lotus bloom, which is a symbol of enlightenment.
Step 3
Snip a 5-foot piece of string with 6mm or 8mm beads for a standard 108-bead mala. Give yourself more string to work with if you’re using larger beads or putting spacer beads between the mala beads. Tie off one end of the string, leaving a 5- to 8-inch tail to be used as a tassel or a connection point for your additional embellishments.
Step 4
Next, string your beads in the desired order, knotting or inserting spacer beads between each. To complete the circle, tie a basic knot using the two ends of your cord. It’s a good idea to use a dab of superglue here to bind the knot and to prevent it from fraying in the future.
Step 5
Now, it’s time to add on your guru bead. This can be difficult if you’re using a T-drilled bead. There are some excellent tutorials available on YouTube to help you with this. After that, you can simply thread both ends of the string through the loops or stringing holes to attach your tassel or other embellishments.
Step 6
Finally, you can now snip away any excess string, and voila- you’ve made your own Mala beads! You’re now ready to start meditating.
How do I use Mala beads?
Mala beads are most commonly used to achieve greater attention and controlled breathing during yoga and meditation, as well as when praying. Take a few cleansing breaths and attempt to calm your mind before using your beads. This is much easier if you’re sitting comfortably with your eyes closed and your back straight.
While continuing to visualize your objective, try to meditate about it and repeat your mantra or chant. Holding them in your right hand, begin with the Guru bead and count, pulling each bead to you with each mantra or chant. Take your time holding and stroking the Mala beads, turning them individually in your hands, and rotating each bead with your thumb and index finger.
The knotting makes it easy to move from one bead to the next and enhances the tactile feel as you concentrate on your thoughts. During your practice, remember to breathe deeply, gently, and relax. These beads are especially useful during progressive relaxation practice while seeking to cleanse the mind and develop intentions.
The knotting makes it easy to shift from one bead to the next and improves the tactile feel while you focus your thoughts. Remember to breathe deeply, slowly, and relax during your practice. These beads are very beneficial when practicing progressive relaxation and aiming to cleanse the mind and develop aspirations. Just be mindful of others if you practice in public places, group meditations, or yoga sessions, as everyone else is attempting to clear their thoughts and focus as well.
How do I care for my Mala beads?
It is recommended to wash your Mala beads on a regular basis to remove dust, filth, and grime that might accumulate over time and extended use. If you have a seed Mala, take additional care and use a cotton swab to get inside all the nooks and crannies.
Crystal bead Malas must be cleaned in accordance with the crystal’s qualities; some will be OK under running water, while others may not be. To sanitize your beads or Tingsha cymbals, use sage.
The seeds of your Mala may darken with time as they absorb your natural oils and energy. This is thought to strengthen the Mala, which is wonderful if you have set an intention that will require a lot of hard work. If your mala breaks, it is a sign that your purpose is no longer one that you require in your life, and it may be time to set a new one.
How do I make my own Mala tassel?
These instructions can be used to make a stand-alone tassel or to add one to the first set of instructions to make a mala. This is a more complicated method of tying your tassel, so give yourself a few tries to get it correctly.
- Tassel can be wrapped around a business card, credit card, or piece of cardboard. The length should be about a quarter to half an inch longer than you want your tassel to be so you can trim it evenly. Wrap until the required thickness is reached. This is a personal preference that may require some trial and error.
- Cut the thread and evenly wrap it around the knotting cord.
- Tie a single knot, followed by another, immediately opposite the guru bead. Pull the knots tight, and then wrap the rope with the remaining tassel thread.
- If you’re using the same thread as your tassel, tie a knot or make a loop to identify your tassel tie thread from your tassel wrap thread so you can find it when you’re ready to tie the two ends together.
- Lay the thread parallel to the tassel and hold it near the top of the tassel, near the guru bead. Begin wrapping the thread around the tassel while holding the thread at the top.
- After several wraps, release the grip at the top of the thread and pull the thread you were holding through so that there is no additional thread at the top. If you pull on the thread and the entire tie spins, you need to wrap it several more times. You should be able to draw the thread down without causing the remainder of the wrapped thread to move.
- If you want the wrap to be longer, continue wrapping the thread around. If you construct a really lengthy wrap before pulling the thread through, it may be difficult to pull and the thread may snap.
- Once you’ve reached the desired length, tie the two strands together. Begin with a double knot, then a single knot. Finally, apply a small amount of glue to the knot and press down to allow the strands to dangle down with the tassel thread.